Like a lot of Ekko owners, I’ve had issues with the Carefree awning binding while extending and retracting.
Mine has done it for quite a while, but because I rarely use the awning, I never spent much time figuring out what was actually happening.
Once I finally got up on a ladder and watched the mechanism closely, the problem became pretty obvious.
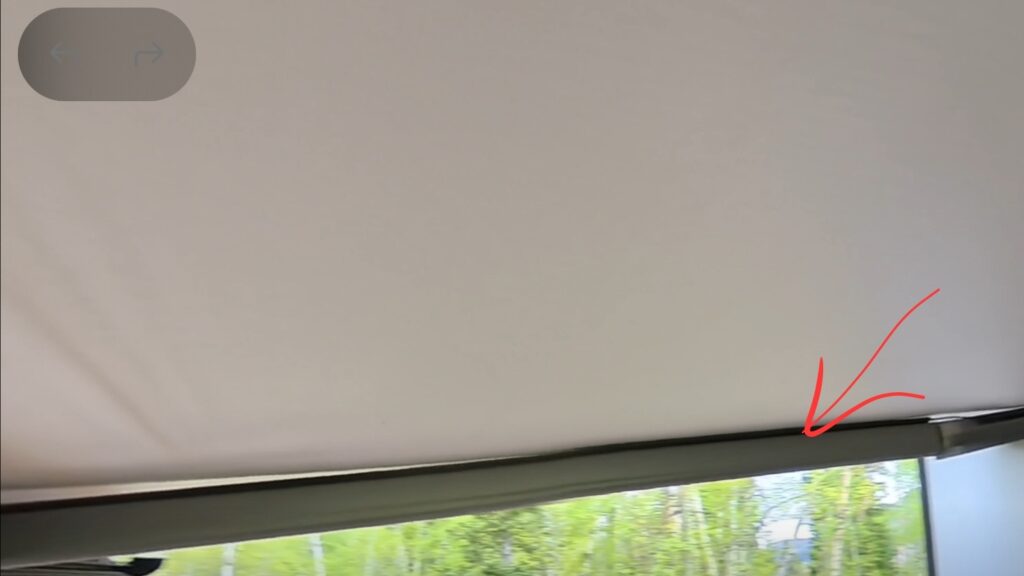
On my awning, the issue was the black plastic wire-management strip for the LED wiring along the rear arm. As the awning moved in and out, that strip was binding against the top edge of the housing.
The fix was simple:
remove the strip from the top
relocate it to the side of the arm
make sure there’s still clearance when the arm folds closed
The important part is placing it on the correct side of the arm. One side folds tightly against the adjacent aluminum extrusion and won’t leave enough clearance. The other side remains angled slightly away from the housing and works correctly.
After moving the strip, the awning now opens and closes smoothly with no binding.
Honestly, once I saw the problem, it immediately became one of those:
“How did I not notice this sooner?”
It also looks pretty clear that the LED wiring solution was added after the original awning design rather than being integrated into the extrusion itself.
May 22–25 — Sand Creek Pass Area (Red Feather Lakes Region)
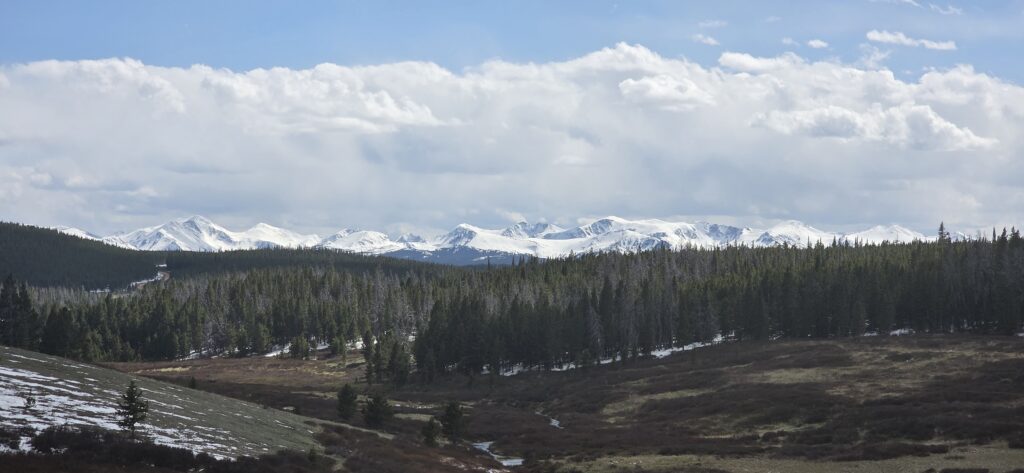
Spent the first three nights camped near Sand Creek Road / County Road 86, near Sand Creek Pass outside the Red Feather Lakes area.
This continues to be one of my favorite spots in northern Colorado.
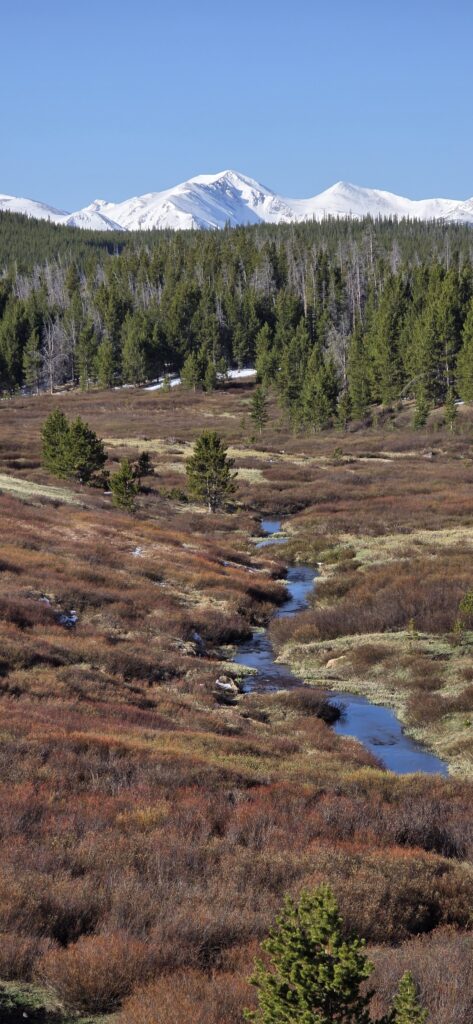
The campsite sits up on a ridge with huge views, while a small creek and heavy underbrush sit down below. The dogs absolutely lose their minds up there in the best possible way — running through the brush, splashing through the creek, and wandering the roads with almost nobody around.
At this time of year, the area was nearly deserted. I think I saw one other camper the entire time. Many side roads were still closed from winter, and it felt like the main road had only recently opened.
Temperatures were cold:
freezing overnight
rarely above ~60°F during the day
Mostly jeans and long sleeves weather the whole time.
The site itself is dispersed camping, though there are multiple fire rings spread along the ridge/pullout area. One downside is that during busier times of year, other campers can move in and effectively take over the area. That happened to me once a few years ago and I ended up relocating. This trip, though, was quiet and perfect.
Most days were spent hiking roads with the dogs, relaxing, and just getting away from the shop for a while.
Vehicle / Rig Notes
One goal of this trip was testing the suspension work recently done by Titan Vans.
Unfortunately, after roughly $6,500 in repairs/work:
the front-end knock is still there
the rear squeak is still there
At this point I’m beginning to think it may simply be something I have to live with, because the recent work appears to have changed nothing.
Not the result I was hoping for.
May 25 — Lily Pond / Brinker Creek Area
After leaving Sand Creek Pass, I continued farther along County Road 86 in a direction I’d never explored before.
Several roads were marked:
“No winter maintenance”
…but were still passable.
Eventually I wound up following County Road 103 toward the Lily Pond Lake / Laramie River area, where I found a number of excellent dispersed campsites along the river corridor.
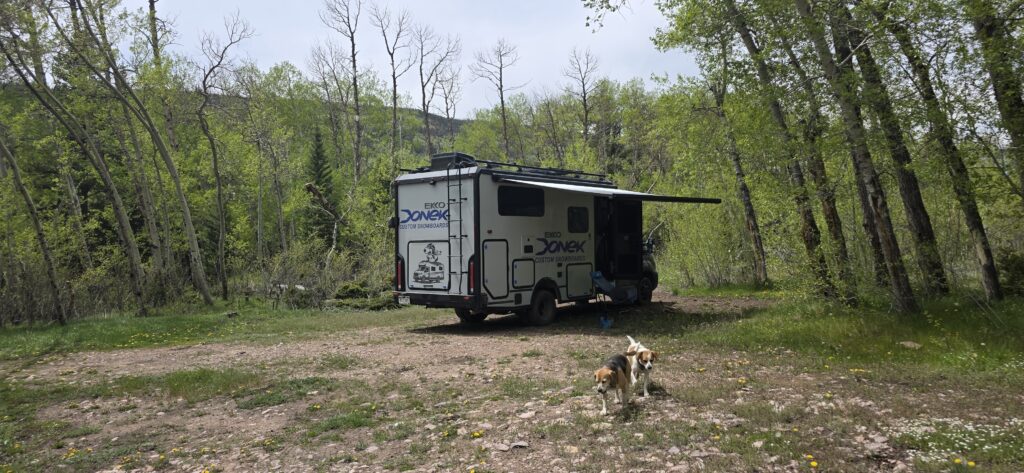
I camped near Brinker Creek, with the creek running essentially right outside the door of the camper.
Completely different feel from Sand Creek:
fewer dramatic views
more enclosed forest
quieter
creek-focused camping
A really enjoyable spot.
May 26 — Kelly Flats Campground (Poudre Canyon)
Rain and thunderstorm forecasts had me concerned about getting stuck if the roads turned muddy, so I moved down canyon to a paved National Forest campground along the Cache la Poudre River.
Stayed at Kelly Flats Campground off Highway 14.
Ironically, the forecast turned out to be completely wrong and it never rained at all.
Still, it worked out well:
quiet
uncrowded
water refill available
easy access
good place to reset before heading back toward Denver/Watkins
This time of year — especially midweek — the campground was surprisingly empty.
There’s also a really cool 4×4 trail directly across the highway from the campground. Way too steep and rough for the Ekko, but excellent hiking terrain with the dogs.
One evening we hiked downstream along the river on the opposite side from the highway. Beautiful stretch of canyon and it looks like there may be additional hiking opportunities farther down near Mountain Park Campground.
Overall
This trip was mostly about:
escaping warmer temperatures in Watkins
resetting mentally
getting away from the shop
spending time outside with the dogs
Nothing dramatic. Just a reminder that northern Colorado still has a lot of excellent places to disappear for a few days without driving halfway across the country.
One of the ongoing challenges with the BeagleBus in cold weather has been uneven heat distribution.
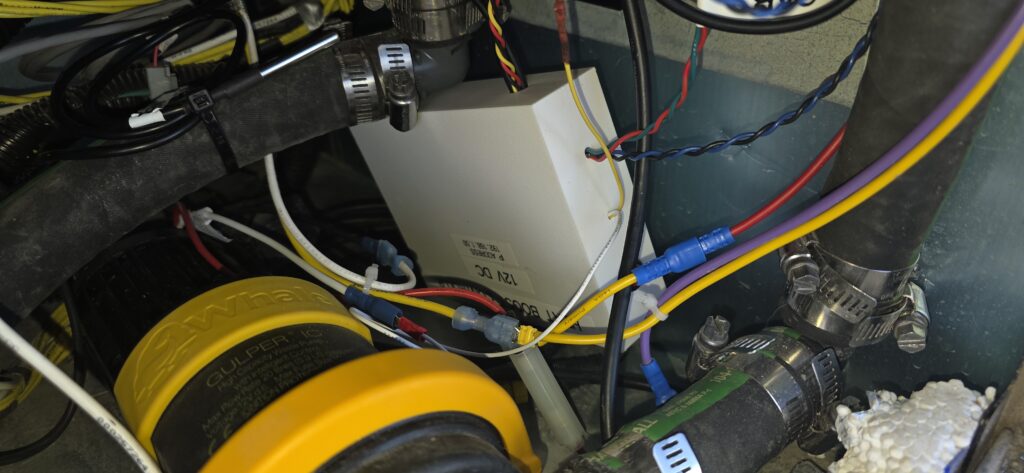
The furnace is located toward the rear of the camper, and by the time warm air travels forward through the ducting, much of that heat has already been lost. The front portions of the camper — particularly the Gulper pump and electronics bay — consistently run much colder than the main living area.
Because of the camper’s layout, the Gulper pump is located outside the primary wet bay in its own electronics compartment at the end of one of the longest furnace duct runs. Over time, this has made that area noticeably vulnerable during cold-weather trips.
I’ve had to replace the Gulper pump twice. Both failures occurred on very cold days. While I can’t say with certainty that freezing caused those failures, the timing strongly suggests that low temperatures may have played a role.
The nearby battery compartment also tends to run cold in winter conditions, sometimes dropping below ideal charging temperatures when relying on alternator charging.
Rather than adding additional heaters, the problem increasingly looked like an airflow issue.
So I ran a simple experiment.
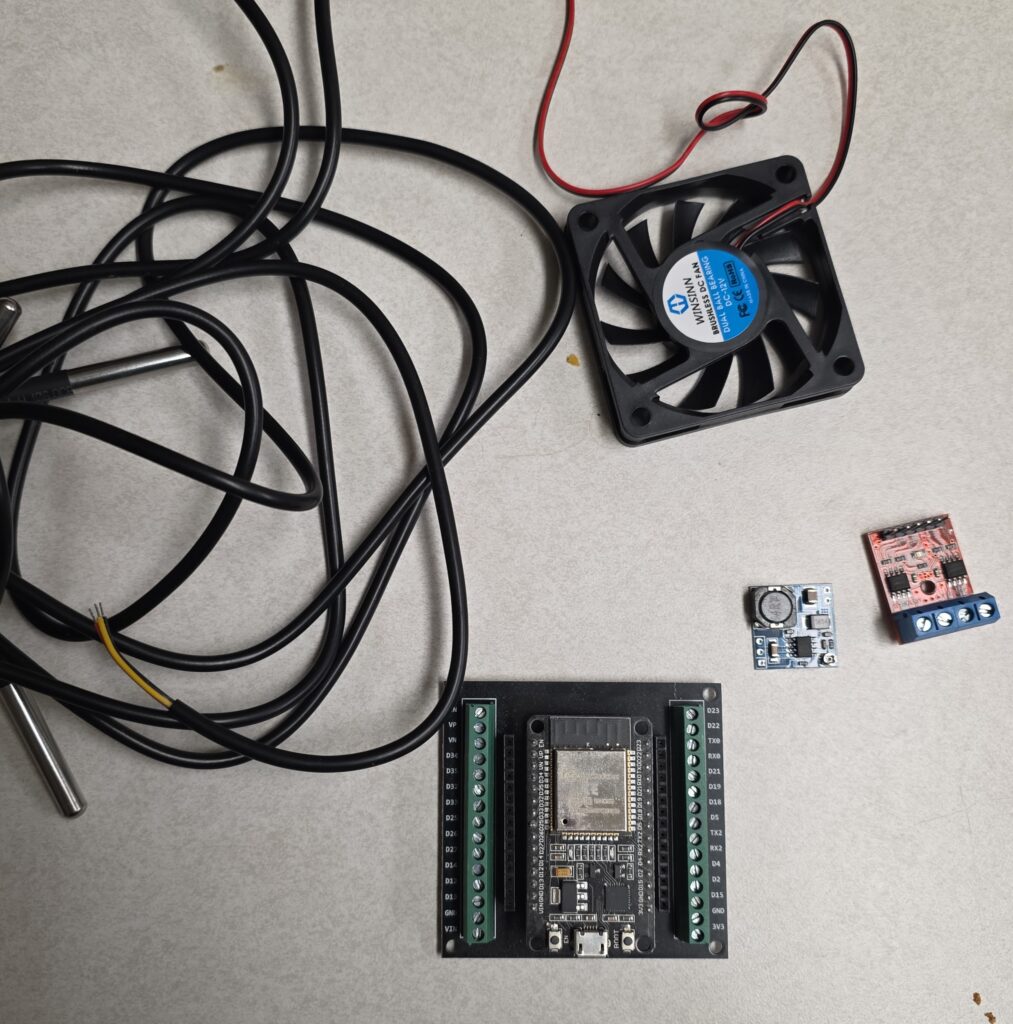
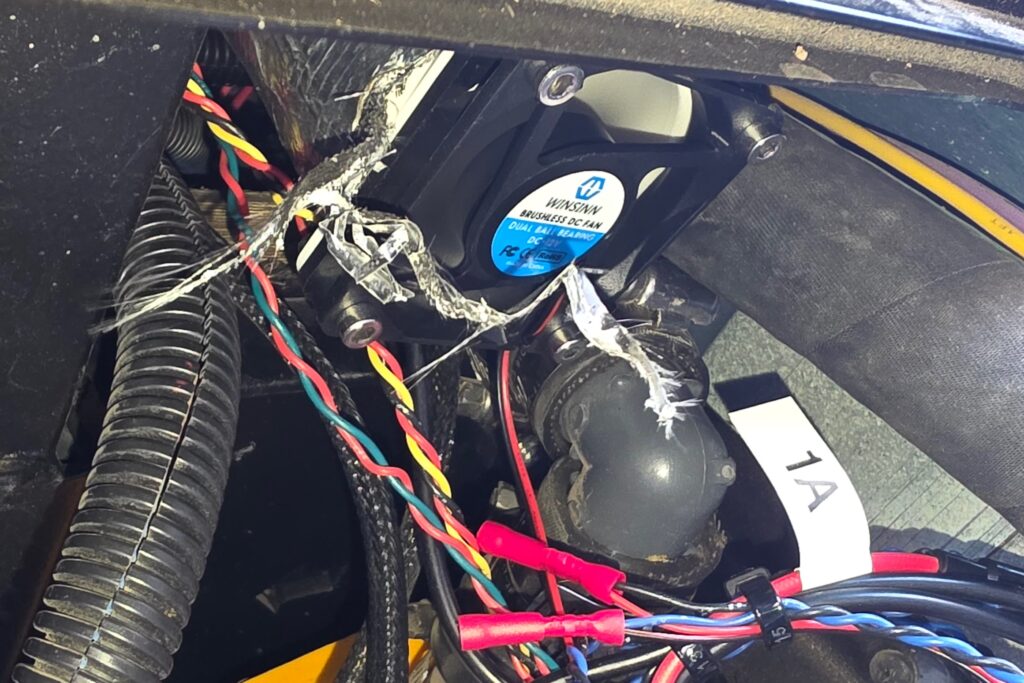
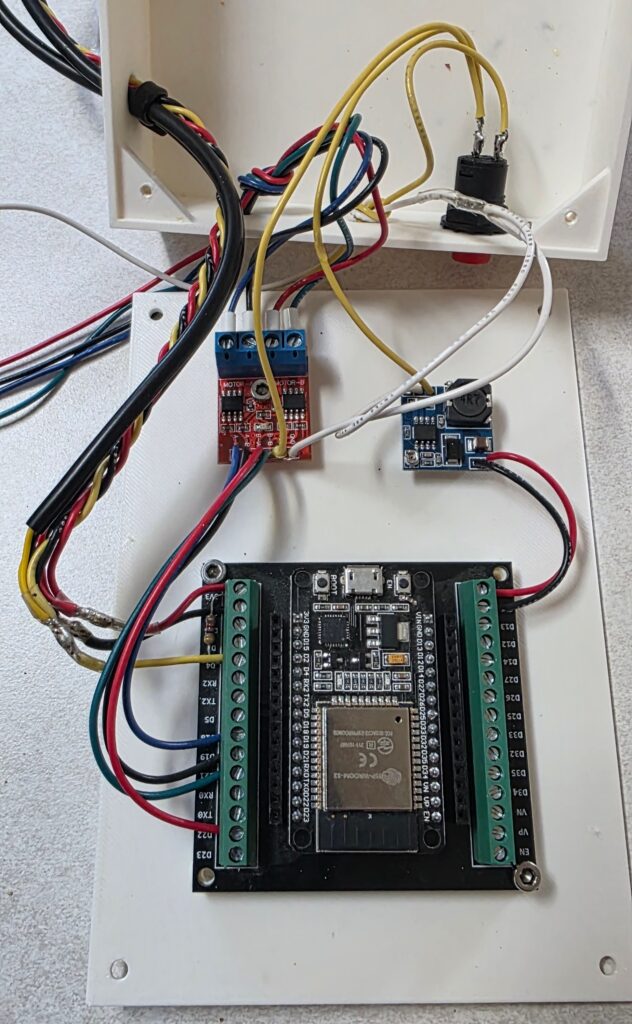
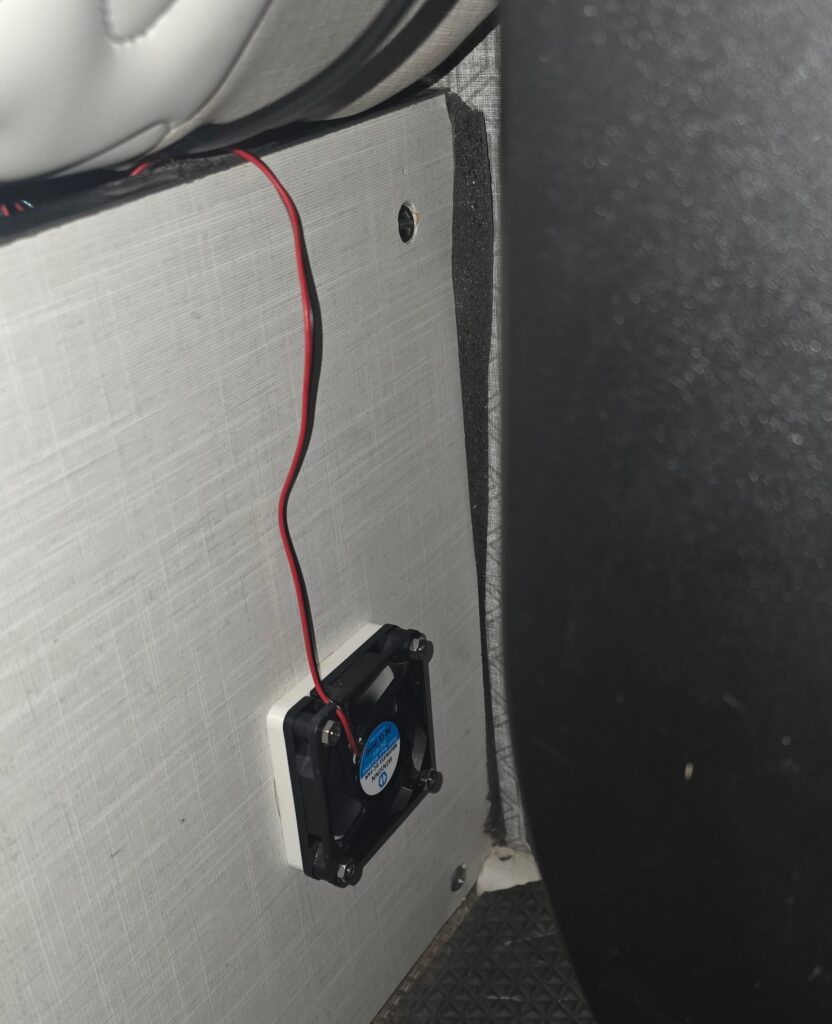
I temporarily connected a small PC fan to the end of the furnace duct feeding that compartment to see whether actively pulling warm air forward would make a measurable difference. The result was immediate — temperatures in the bay increased by roughly 30–40°F.
That confirmed the furnace was producing enough heat.
It simply wasn’t reaching the areas that needed it most.
From there, the logical next step was automation.
The Goal
Build a system that could:
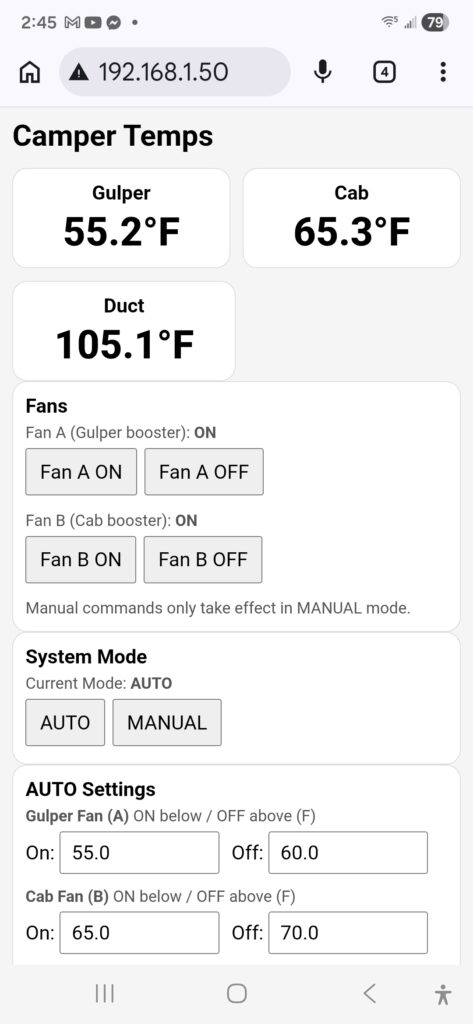
Monitor temperatures in critical areas
Automatically pull warm air toward colder zones
Reduce the likelihood of cold-weather failures
Operate entirely from the camper’s native 12V system
These are field-tested notes from winter travel and camping in my Winnebago Ekko across Colorado, Wyoming, Montana, Idaho, and parts of Canada. This started as lessons from the 2023–2024 winter season and has been updated with what I’ve changed and observed through January 2026.
I don’t live in the Ekko full-time year-round, but I spend extended stretches in it during winter travel and have regularly camped in temperatures down to -20°F to -30°F.
Thermal Weak Points
Above and Below the Windows
The biggest heat loss isn’t the glass — it’s the aluminum framing above and below the windows, which conducts cold into the living space.
What helped: I cut and press-fit ¾” foam insulation board into these areas for winter use. This made a bigger difference than insulating the window glass itself.
Entry Door and Frame
The metal door frame gets ice-cold and conducts a lot of heat out. My door doesn’t seal perfectly, which makes this one of the most noticeable remaining heat loss points.
Next step: A thermal camera pass is planned to pinpoint where the worst losses are around the door/frame before deciding what to change.
Heating Strategy
Propane Heat While Driving
This isn’t something you’ll see officially recommended, but it’s what has worked reliably for me.
I run both the Truma water heater and furnace on propane while driving in extreme cold. It’s been the most consistent way I’ve found to keep the rig and systems above freezing on long drives.
I have the Truma electric antifreeze kit installed, but the propane-only approach has worked well enough that I haven’t seriously tested the antifreeze kit as a primary strategy. If I were in a place where running propane while driving could realistically cause a major fine or issue, I’d experiment with it more, but I’m skeptical it would handle deep cold on its own.
Electric Heat
Electric heat can absolutely be useful, and it can save propane if:
you’re on shore power
or you’re trying to stretch propane and avoid refills
I’ve used a small electric heater successfully:
while traveling in Canada
on hookups
and experimentally via battery for ~3 hours before switching to the generator and continuing
What works best:
Put the heater in the main living area near the dinette
Run the Truma/furnace circulation fan at level 6 to move heat
My cutoff: I generally wouldn’t rely on electric heat below about 20°F. At that point, you’re not pushing enough heat into the under-coach compartments. You end up mostly recirculating cabin air while the compartments can drift significantly colder than when the Truma furnace is doing the primary heating.
Electric heat is a good tool — just not the tool I’d choose as the primary system heat below ~20°F.
Thermal / Comfort Setup
Cab Curtain Fix
The factory cab curtain is a major weakness because it hangs ~1.5–2 inches above the floor, which lets cold air pour in from the cab.
Short-term workaround: stuff a blanket under it at night
Permanent fix (what I did): buy fleece (Walmart) and sew a strip onto the bottom to extend it another 2–3 inches so it seals to the floor
The permanent fix is dramatically better than dealing with blankets every night.
Floor Insulation
The floor gets brutally cold in winter. This season I covered nearly the entire floor with EVA foam interlocking puzzle mats (Costco), cut tight to fit.
Massive improvement in how warm the coach feels (especially feet)
Downside: seams can separate slightly and trap dirt/debris
Long-term I’d prefer a single-sheet solution (SeaDek or similar), but even the puzzle mats made a huge difference.
Sleeping Setup
Heated blanket under the mattress pad, turned on ~15 minutes before bed Keeps the bed warm without overworking the furnace overnight.
Moisture and Plumbing Management
At around -20°F, I’ve had the shower drain freeze overnight even after using it the night before.
What helped:
Leave the bathroom door cracked ~6″
Open the cabinet under the kitchen sink overnight
Let warm air circulate around plumbing
In sustained deep cold, I keep the Truma water heater in “Comfort” mode overnight and while driving.
System Observations
I found a few partially crushed heating ducts and straightened them. No dramatic change, but worth checking.
In deep cold, the rig seems to plateau around ~62°F overnight even with the furnace working hard. That feels like a realistic baseline for an unmodified Ekko.
Notes Going Forward
I’ll keep updating this as I test:
the electric antifreeze kit (if/when I do)
better door sealing/insulation after thermal imaging
a cleaner single-sheet floor solution
This post exists so I don’t forget what works when temperatures get genuinely cold.
While traveling north through southeastern Wyoming, I took WY-210 (Happy Jack Road) instead of heading straight to I-80. I wasn’t intentionally scouting or exploring — I was just driving and paying attention — but the number of potential access points along this corridor stood out enough that it was worth logging.
This post is not a guide. It’s a set of notes for future reference so I don’t forget what I saw.
WY-210 (Happy Jack Road)
The WY-210 corridor sits between Cheyenne and Laramie and runs along the southern edge of the Medicine Bow National Forest. What stood out immediately was how close everything is to major routes, while still feeling remote once you pull off the pavement.
While driving this stretch, the following areas caught my attention as potential camping, access, or future exploration points:
North Crow Reservoir area Multiple pullouts and open areas near the reservoir with adjacent public land.
Vedauwoo Road (FS 700) — north access Entered from the northern side. Gate was open at the time and the road was clear at entry. Confirms an alternate way into the broader Vedauwoo area.
Pole Mountain pullout An accessible, scenic pullout that immediately stood out as a place worth revisiting.
Telephone Road Noted as another access road branching off the corridor.
Pilot Hill Road Another signed access point worth a closer look later.
Happy Jack Recreation Area Entrance signage noted while passing through.
None of these were explored in detail on this pass — they were simply logged as places that looked promising enough to warrant a return visit.
Unexpected Convenience: I-80 Westbound Rest Area
Just before merging onto I-80 west toward Laramie, I noticed a westbound rest area that I hadn’t previously known about. Its proximity to the WY-210 corridor makes it a useful reference point for:
rest
weather delays
emergency or fallback overnights
It reinforced how well-positioned this entire corridor is relative to major travel routes, even in winter.
Why this is logged here
This area feels like one of those places that’s easy to overlook if you’re just transiting between Cheyenne and Laramie. Seeing it in winter, with roads open and access points clearly visible, made it worth flagging.
I’ll come back to this corridor with more intent later:
Montucky Clearcut (MCC) was originally the anchor for this trip — a carving-focused event at Turner Mountain. When the event was canceled, the plan shifted. Instead of one destination, it became a northbound arc through Wyoming, Montana, and Alberta: ride what’s good, adjust when needed, and let the road fill in the rest.
What followed was 23 days of snow, wind, prairie miles, border crossings, community mountains, questionable signage, excellent grooming, terrible grooming, forest hikes, laundromats, and a lot of windshield time.
January 23–25
Colorado → Wyoming → Targhee Positioning
Departed Watkins just after noon on January 23. First night was Curt Gowdy State Park — reliable, winter-open, electric hookup, predictable reset stop. Fuel at Buc-ee’s in Johnstown came in cheaper than Costco that day, which was worth noting.
January 24 took the scenic route along WY-210 (Happy Jack Road), logging future camping access points: Pole Mountain, Telephone Road, Pilot Hill, Vedauwoo north access, and more. Overnighted near the New Fork River — quiet, spaced out, and worth revisiting.
On January 25, instead of searching for dispersed camping, I staged directly at Grand Targhee and paid for three nights in the Targhee lot. Simple, efficient, and zero guesswork.
January 26–28
Grand Targhee (3 Days)
Targhee once again delivered the best overall snow and grooming of the trip.
Consistent surface quality
Predictable corduroy
Excellent carving confidence
No survival riding required
It set the bar early and never really got beaten.
January 29–31
Showdown, Montana (2 Days Riding)
A travel day north on the 29th set up two days at Showdown.
Showdown continues to be one of the most honest mountains around. Grooming quality was strong — likely second or third best of the trip — though their late grooming schedule tends to produce softer snow instead of firm, grippy cord.
The vibe here is pure Montana:
No flash
No ego
Just functional terrain and people who like sliding on snow
February 1–3
Whitefish (2 Days Riding)
After a travel day on February 1, Whitefish delivered the toughest conditions of the trip.
Freeze-thaw cycles combined with inconsistent grooming made Monday survival mode. Tuesday improved slightly but still felt like work.
I rode with Dave Redmond, Paolo Celle, Mellen Jay, John Gibson, Carver Bolby, and a number of others from the MCC event who had diverted there after the cancellation. It was simply fun to hang out with those guys and get some laps in together.
February 4–6
Eureka → Canada → Nakiska (2 Days Riding)
Spent the night before crossing in a park in Eureka. It was a bit of a gray-area situation — signage allowed tent camping but prohibited motorhome camping. No one bothered me. It was quiet, uneventful, and worked just fine.
Crossed the border at Roosville on February 4 and drove to Nakiska, staying at Kid Mountain RV Park.
Nakiska was a fascinating contrast to Whitefish. The snow was similarly affected by freeze–thaw cycles, but the grooming was outstanding. Surfaces were deliberate, consistent, and technical. It was demanding riding — but in a productive way.
February 7–8
Castle Mountain (2 Days Riding)
Castle might have been the most compelling mountain of the trip.
Community-owned. Shareholders living at the base. Dirt roads. Modest infrastructure. Color-coded lifts instead of named ones. Families everywhere. Dogs everywhere.
It felt like stepping back in time — like skiing in an era before corporate consolidation took over the industry. It reminded me of riding when I was much younger, when mountains felt independent and local and authentic. It was just awesome.
Grooming quality was excellent. Lower elevations reflected freeze–thaw conditions, but the upper mountain held up well. One groomed run on the second day hit absolute perfection — timed just right and easily one of the best single runs of the season.
After riding the second day, I drove to Crowsnest Pass that evening.
February 8–9
Crowsnest Pass Reset
Two nights in Crowsnest.
Morning hike into the surrounding mountains, exploring old coal mining terrain and letting the dogs roam forest trails. It was a quiet, grounding pause between bigger pushes north and south.
February 10–11
Southbound Transition
Left Crowsnest and headed south, stopping at the Helena Walmart for the night — my first Walmart overnight.
Positioned along 191 for Big Sky, and this is where the tone shifted.
The Gallatin corridor is entirely National Forest, yet there are “No Camping” signs posted all over the place. It feels very much like the town or resort is trying to discourage overnight van use, even though it’s public land. Meanwhile, there were plenty of vans camped along the river pullouts, in ski area lots, and in town.
There’s a large parking lot behind Tips Up where a local told me it was perfectly legal to stay overnight. And there were absolutely tons of van-lifers and ski bums parked at the ski area itself.
The contrast with Castle couldn’t have been sharper.
Castle felt open and welcoming — like “come ride, stay if you want.” Big Sky felt corporate — “we want your money, but we don’t want to see you staying here.”
It’s hard not to notice that difference.
February 12–13
Big Sky (2 Days Riding)
Big Sky is massive and rewards exploration.
One of the most interesting observations: Ambush lift (lower light exposure) held better snow and fewer crowds than the flashier front-facing lifts with longer lines. Sometimes the best snow hides in plain sight.
Rode February 12 and 13. Finished the second day, then drove roughly six hours south that evening.
February 14
Return to Watkins
Completed the final leg home on February 14.
Trip closed.
Trip Metrics
Total Trip Duration: 23 Days Total Ride Days: 14 Travel / Reset Days: 9 States Visited: Colorado, Wyoming, Montana Province Visited: Alberta Border Crossings: 1 First-Ever Walmart Overnight: Helena, MT
Resort Performance Summary
Resort
Days
Grooming
Snow
Terrain
Overall Impression
Grand Targhee
3
A+
Best overall
Flowing, consistent
Benchmark mountain
Showdown
2
A-
Good
Modest but fun
Honest Montana riding
Whitefish
2
D
Tough
Interesting
Grooming limited experience
Nakiska
2
A+
Challenging
Technical
Exceptional mountain management
Castle Mountain
2
A
Mixed but strong up high
Big potential
Community mountain, old-school feel
Big Sky
2
B+
Variable
Massive & complex
Strategic lift choice matters
Lessons Learned
Fully Refill the Water Heater After Winterizing
If I winterize by blowing out the lines, I need to fully refill and purge the water heater before I hit freezing temperatures. I ran into trouble early on because I assumed the system was fine after refilling the tank. It wasn’t. Air in the lines and a partially filled heater created avoidable stress. That’s now a checklist item, not an afterthought.
Ask Humans, Not Just Signs
Big Sky reinforced something I keep relearning.
Signage is not the full story.
When a place looks unfriendly to camping, I need to ask:
Lift employees
Locals
People inside businesses
Other van campers
The answers tell you what’s tolerated, what’s enforced, and what the culture actually is. They also tell you which towns and businesses I’d want to return to.
Castle felt open and welcoming.
Big Sky felt like it wanted my lift ticket but not my van in view — even though the land along 191 is National Forest. The contrast was striking.
Down Days Matter More Than I Think
On the December trip, I built in more stationary days. This time, I mostly rotated between driving and riding.
The only real down days came at Crowsnest Pass — and those ended up being some of the best days of the trip.
Hiking. Dogs running. No lift lines. No logistics.
That rhythm shift made everything feel better.
On longer trips, I need to intentionally schedule decompression days. They’re not wasted time — they’re part of the trip working properly.
Grooming Quality Can Override Snow Quality
This trip made that lesson very clear.
Whitefish had difficult snow and poor grooming. Nakiska had difficult snow and excellent grooming.
The difference in experience was massive.
Snow matters. But mountain management matters just as much. I’ve started evaluating resorts less by snowfall totals and more by how they manage what they have.
Efficiency Is Sometimes the Right Call
I paid to stay in the Targhee lot instead of chasing dispersed camping.
I stayed at a Walmart instead of hunting for something prettier.
I went back to the same laundromat in Great Falls multiple times.
Not every night needs to be romantic. Sometimes the right move is the one that makes tomorrow easier.
Border Crossings Require More Than I Think
The crossings themselves were smooth — I knew what to expect from December.
But returning to the U.S., there’s now an additional CDC dog import form requirement beyond just vaccine records. It wasn’t requested this time, but it could have been.
That’s another checklist item going forward.
The Dogs Are the Trip Barometer
When the dogs get:
Forest time
River access
Off-leash movement
Social time with other dogs
The trip feels better.
When it’s drive → ride → drive → ride without much roam time, the energy tightens up.
Their behavior reflects the rhythm of the trip better than anything else.
After about 14 months of living and traveling in the Ekko, I removed the factory microwave and replaced it with a RecPro RPM-8-BK-KT convection microwave with air-fry mode. It fits — but it is not a drop-in replacement, and cabinet modifications are required.
I posted the video below in case it helps someone else thinking about the same swap.
Why I changed it
This wasn’t about power draw, noise, or performance.
I do use a microwave, but almost exclusively for defrosting — usually 30 seconds to a minute, every couple of days. It’s a nice feature to have, but it’s not something I rely on heavily.
What I do use constantly is an oven-style appliance.
I cook nearly everything fresh in the camper:
pizzas
meat pies
chocolate chip cookies
For that, I’d been carrying a Ninja Flip countertop air fryer in one of the exterior compartments. It worked fine, but it was a pain:
it’s large and heavy
awkward to move through the door
had to be brought in and put away every time
Because I was using it so often, that extra friction added up.
The goal of this mod was simple:
stop carrying a separate air fryer
make better use of the existing microwave cabinet
end up with one permanently installed appliance that matched how I actually cook
What I installed
I removed the factory microwave entirely and installed a RecPro combination convection microwave with air-fry mode.
RecPro advertises it as a direct replacement. It is not.
It will fit in the cabinet — but only after modifying the opening and reworking the mounting and internal support.
The standalone air fryer now stays at home. I don’t need to carry it anymore.
Installation overview (high level)
I’m not going to rewrite the video step-by-step here, but these are the major things to expect.
1. Remove the factory microwave
Remove four mounting screws
Unplug it inside the cabinet
Slide it out
Once it’s out, you’ll see a rat’s nest of wiring in the cavity.
Plan on spending about an hour carefully:
reorganizing
packing
and cleaning up wiring so the new unit can fit properly
2. Enlarge the cabinet opening
The RecPro unit requires a larger opening.
I:
ran the shoe of a Bosch jigsaw directly against the cabinet panel
cut the sides and top to size
scribed and cut the bottom edge carefully
If the wiring is managed well, the microwave will slide into the opening cleanly.
3. Address support and depth
The new unit sticks out farther than the original.
To support the weight:
I removed the original stapled wood support
replaced it with angle aluminum at the top
through-screwed it into the plywood structure
added a lower support beam (painted gloss black to match the trim)
I also installed:
two ¾” wooden rails along the sides
to support the edges of the microwave and prevent the heat shield from flexing while driving
The unit is heavy — having a second set of hands helps.
4. Power cord routing
Because access is limited once the unit is partially installed:
I fed an extension cord through the cabinet opening first
plugged the microwave into it
then used it to pull the power cord through as the unit slid into place
This worked well and avoided fighting blind access behind the cabinet.
5. Final install
Install the trim sash
Secure it with the six mounting screws
Clean up
Cook something
What to know before doing this
This is not a drop-in swap
Cabinet modification is required
You need to think about:
wiring management
structural support
clearances
mounting, not just fit
None of it is especially complex, but it is deliberate work.
Bottom line
This mod wasn’t about upgrading for the sake of upgrading.
It was about:
how often I use an oven-style appliance
not hauling a heavy air fryer in and out of the camper
making the microwave cabinet earn its space
The camper now matches how I actually cook:
fresh meals
frequent baking
occasional defrosting
Logged here so it’s documented — and so the next person doesn’t have to guess whether this fits or what it takes to make it work.